
The most basic of earring designs can include just a single bead and headpin. What better way to amplify your designs than with one of these great headpin ideas for jewelry making you can incorporate with your next piece. Make this functional finding turn into a creative element with only a few simple supplies. Here are some great headpin ideas to make today.
1. Ball Pins
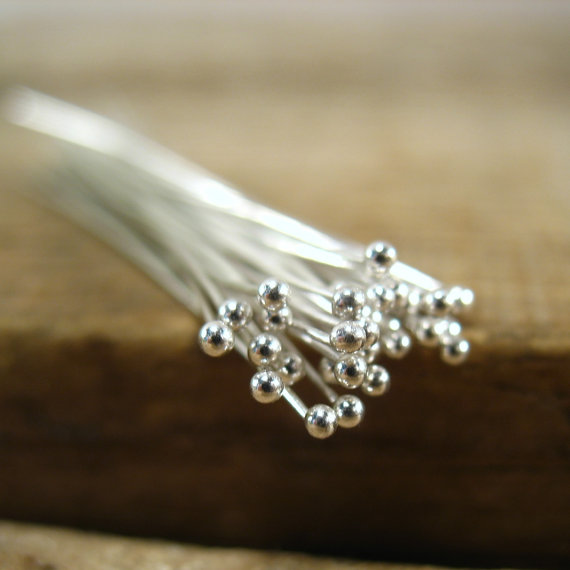
These sterling silver ball head pins are made with 26 gauge wire making any wire wrapping project easy to do. With a 1mm size ball, this style can easily accentuate small pearls, glass bicones, or stone beads.
2. Paddle Headpins
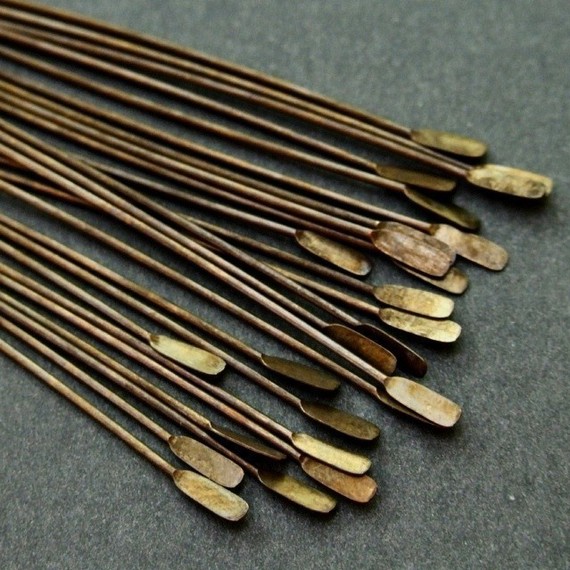
Paddle headpins are designed to stop a bead from immediately falling off the pin by offering a flattened wire end. These are a perfect option for creating a floating style design to your pieces and pair well with stone bead styles that have a deepened color and wider hole.
[CLICK BELOW FOR VIDEO]
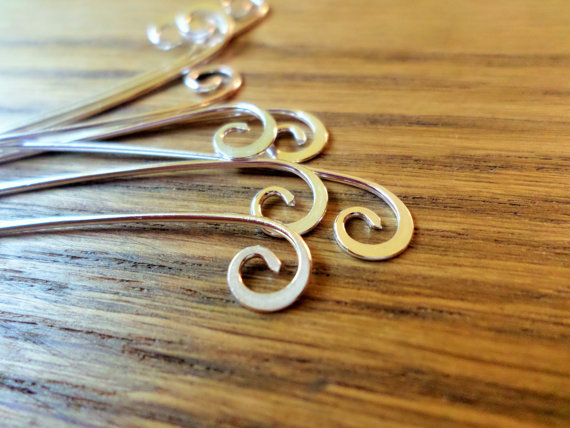
3. Rose Headpins
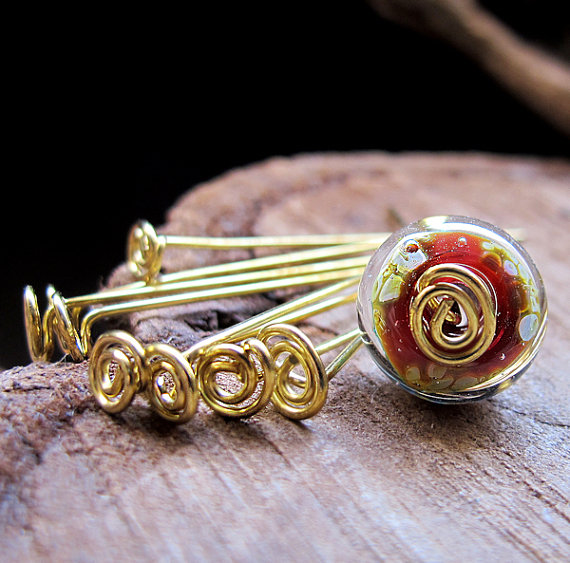
For unique and creative bead designs, incorporate some rose headpins into your pieces. These are a perfect solution for many wide opening murano glasswork designs. These pins are made with a spiral bottom with a 5mm diameter and length 1.5 inch. These headpins were made using 20 gauge wire for a solid framework.
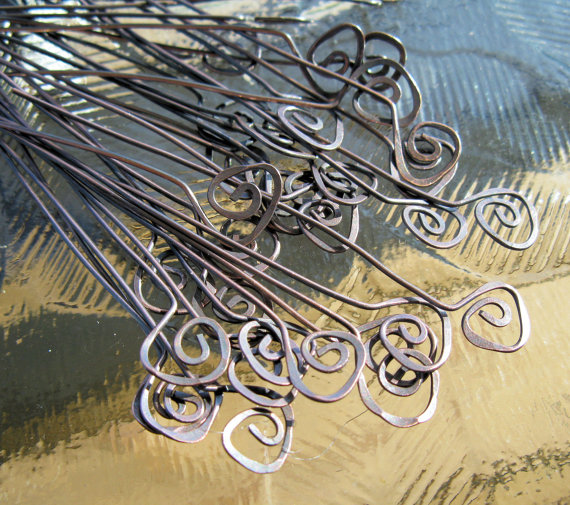
4. Spiral Headpins
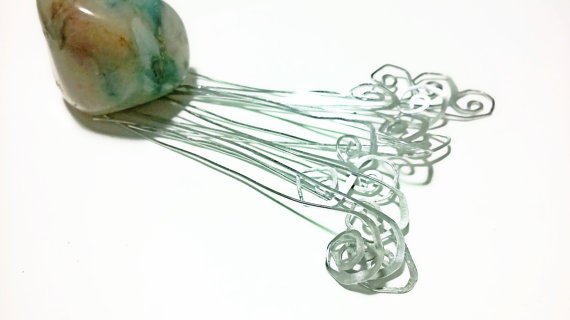
Adding some handcrafted spiral headpins to your designs is a perfect way to spotlight many bead styles. In the above image, you will find one variation of spiral headpins that are hammered and slightly altered with the center pulled out for a loosely laid end.
5. Headpins Fiddlehead
These loosely spiral end headpins are hammered for strength and shine and oxidized for a dark antique look. These fiddlehead headpins are made with 22 gauge wire for solid form but ease in wire wrapping your top closure.
6. Coil Headpins

These black iron headpins are made with a coiled end and heavily oxidized for a great vintage look. A perfect style for many glass and darkened stone looks. These coil headpins are made from 21 gauge wire and are 2 inches in length.
7. Semi Swirl Headpins
These semi swirl headpins are constructed with thickened 18 gauge wire for a solid hammered shine at the end. These pins can be additionally tumbled for high shine and hardness.
8. Leaf Headpins
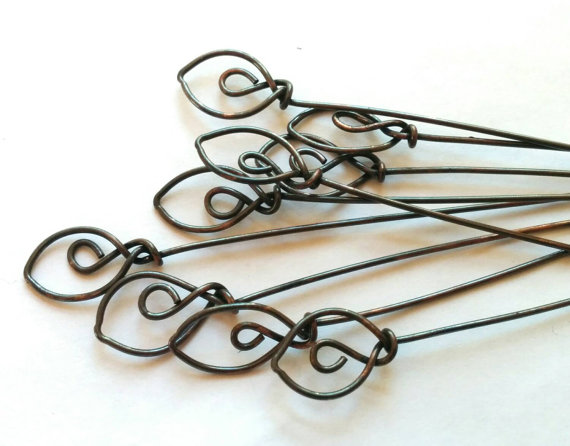
These leaf headpins offer an added style you can easily incorporate into your jewelry designs. With an added dangle at the end, you can simply add a single bead to the pin, close and be finished or use as a decorative feature in itself. These pins are tumbled to harden and polished with renaissance wax to maintain the finish.
9. Copper Squiggle Headpins
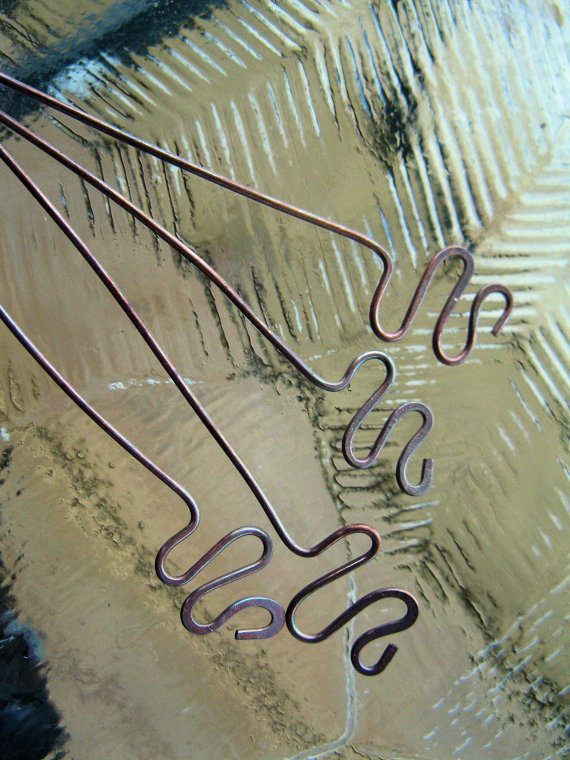
These squiggle end headpins are constructed with 22 gauge wire and oxidized for a dark patina look. With these curled pins, they are hammered for added strength and shine. These headpins are a perfect choice for those looking to expand their jewelry designs by wrapping seed beads between each squiggle or used for the bottom of other attached bead options.
10. Trefoil Headpins
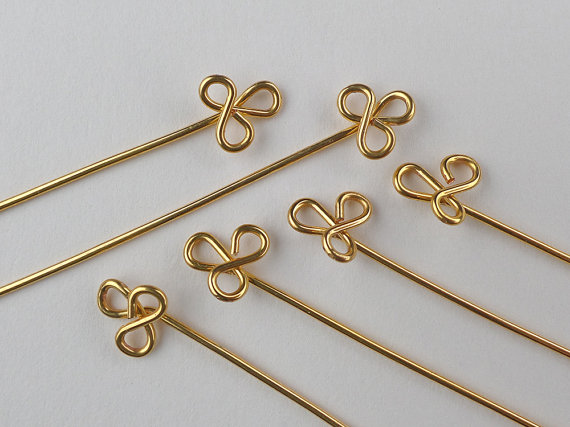
These trefoil headpins are made with 20 gauge wire for strong formation and custom created with curves for added texture and design. The trefoil part measures at a quarter of an inch. This style is a great option for square and rectangular shaped beads.


Thanks for sharing. How do you form the “Paddles” on #2?
Bev, thanks for stopping by. I added a link under the paddle headpins section of the blog post. This will take you to a YouTube video I created to show you how to make these yourself. Hope this helps. Happy Crafting!
I can’t find the trefoil video. Where is it?
Sue, I do not have a video on making the trefoil headpins produced yet. It is a great suggestion.
Good afternoon! Just a quickie! What do you find to be best to string beads? Wire, string, elastic cord? ……
Becky, Thanks for stopping by and posting your question. My preferred choice is beading wire or tiger tail. I primarily work with glass beads and semi precious stones, leading me to use a heavier wire for my designs.
Here is a quick run down to their differences:
String: This is the perfect choice for bead weaving projects or designs that require great flexibility and intricate patterns to be made with smaller beads such as seed beads with a needle.
Bead Wire: This is a flexible and diverse option for majority of projects. You can purchase bead wire in a variety of thickness to accommodate lightweight to heavier designs. You can perform some basic weaving techniques with this type of wire as well.
Elastic Cord: This is a great option for acrylic and glass bead designs where you want to forgo a clasp. Preferred most for bracelets where you may have difficulty taking the piece on and off with a traditional closure. The downfall of elastic cord over time is minor stretching of your piece.
Hope this helps!
Crystal
Great ideas. Thanks for posting and sharing this.
It’s wonderful to know you don’t mind sharing, there are so many people who not really want to share…I’m a giver and I love getting people to another level…WONDERFUL YOU!!!
I appreciate your kind words Gloria. That is exactly how I aim to be. Knowledge is power and empowering others to be creative brings me joy!
Could you please tell me how to close or tie off plastic stretch cord. I have lots of it in many colors but never use it because when I tie it off after beading it to make a bracelet or necklace the knot slips apart.
Thank you!
Brigette,
When using the plastic stretch cord, do a double knot to close. Apply tacky glue over the knot and let dry. Hope this helps!
Happy Crafting,
Crystal
crystal …how do you make the rose spiral headpins??
Linda,
You use the round nose pliers to make the center loop. Use a nice wide flat nose plier to grab that center loop and start slowly wrapping the wire around to form the circular shape. You can check out my video on how to make a wire bead cage that uses a similar technique. However, with the rose pins you just want to keep it tighter towards the center and you can pull it out some to give it a layered effect. Once you complete the bottom, simply take the flat nose pliers to the remaining wire and pull it upwards (vertical facing) to create the headpin stem. Hope this helps!
Happy Crafting,
Crystal
Just a thought to explain why and how to “work harden” the wire used to make head pins and the fact that once it is hardened, do not continue to bend it as it becomes brittle and can easily break. .
These are such beautiful designs — thank you so much for sharing. One question, on the fiddlehead design, how did you make some of the sections wider and others not so wide? Is it just a matter of how much you hammer (the more the flatter?). Thanks!!